Description
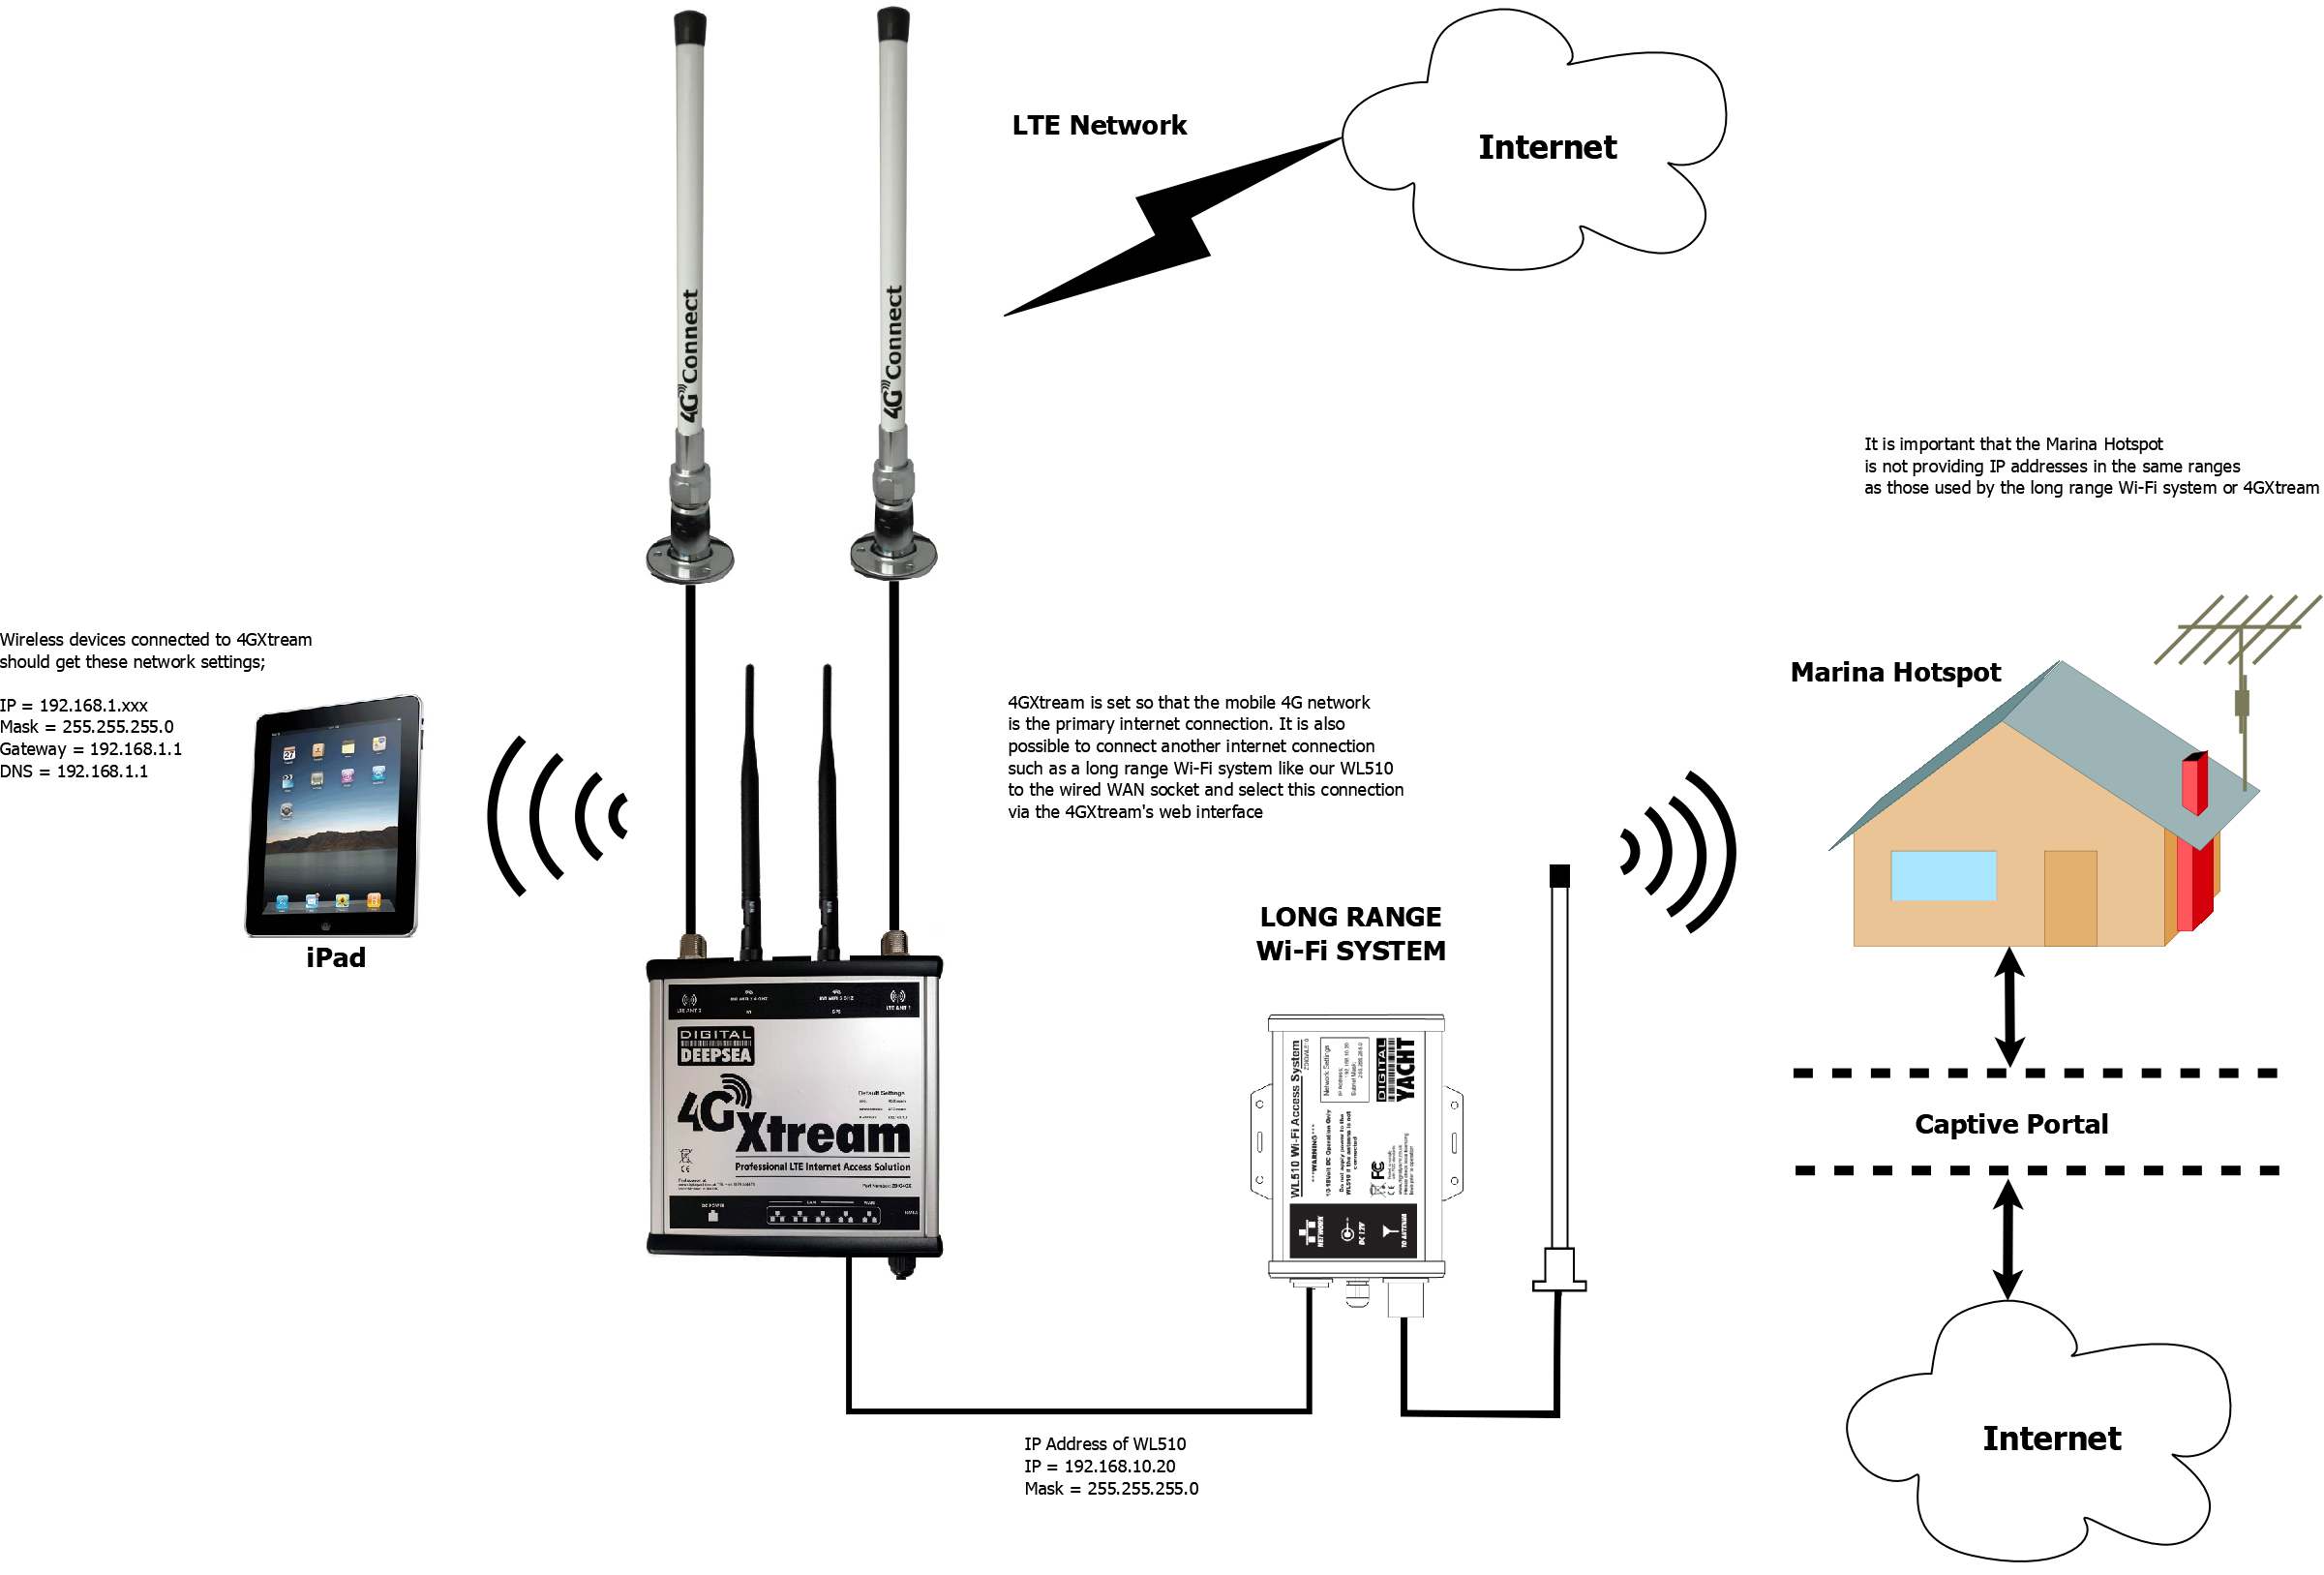
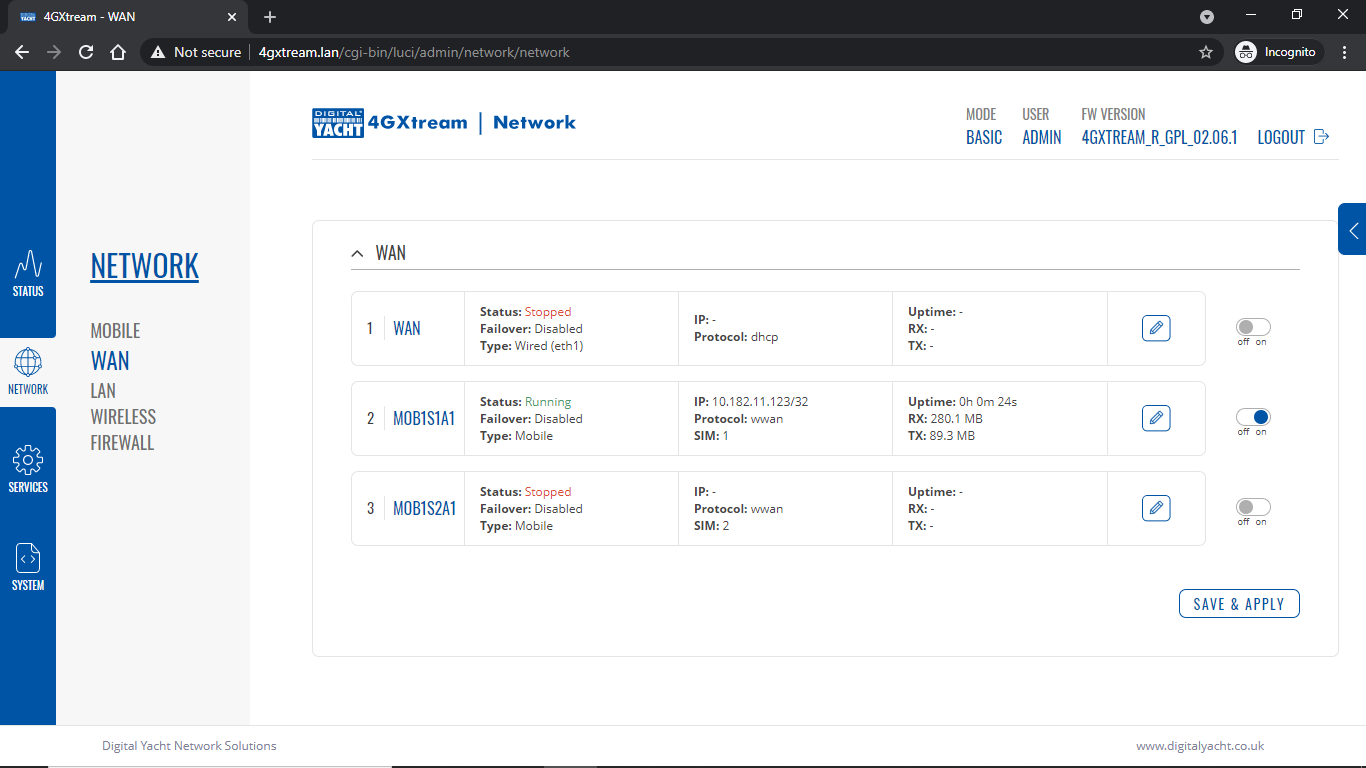
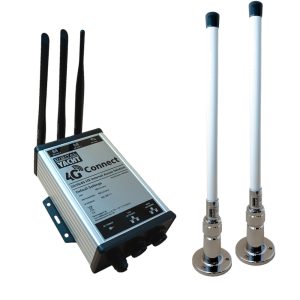
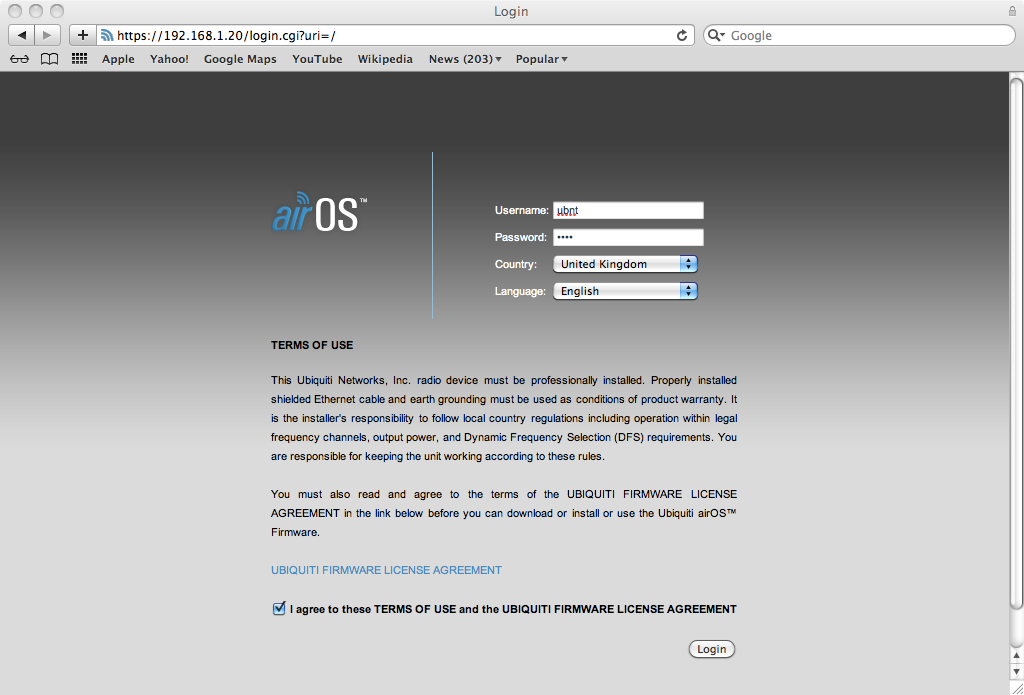
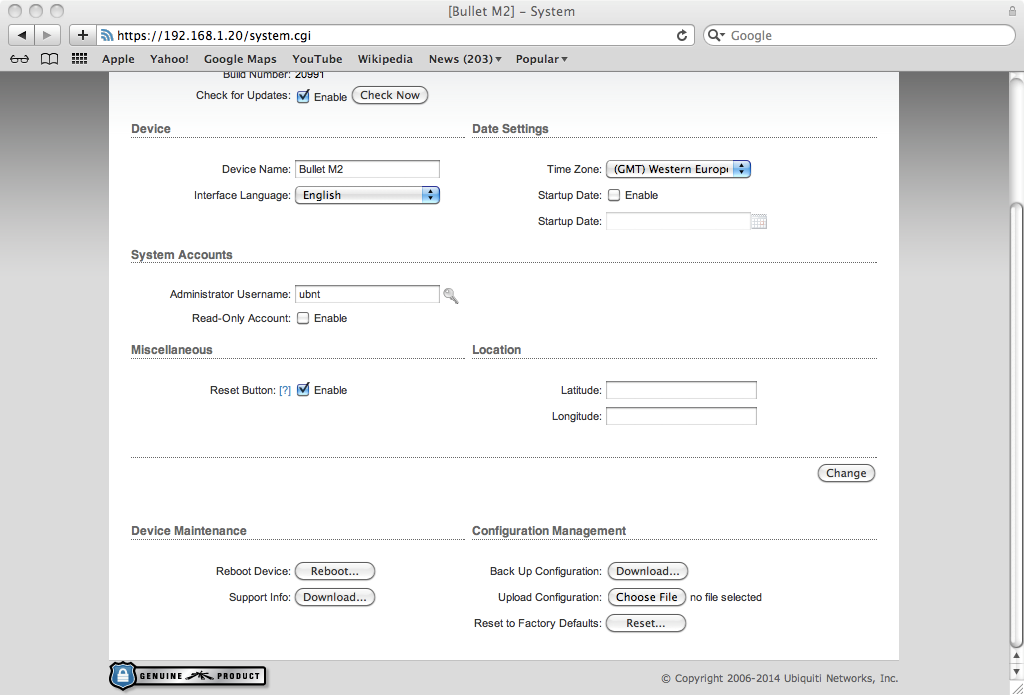
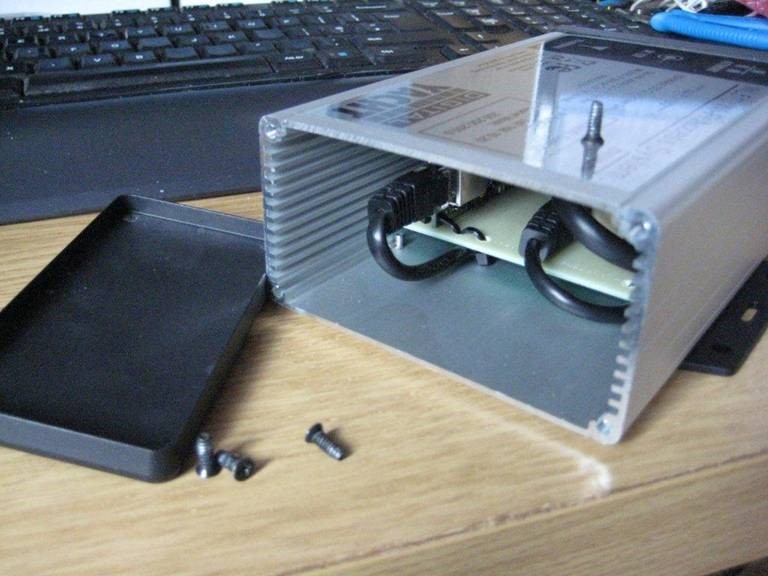
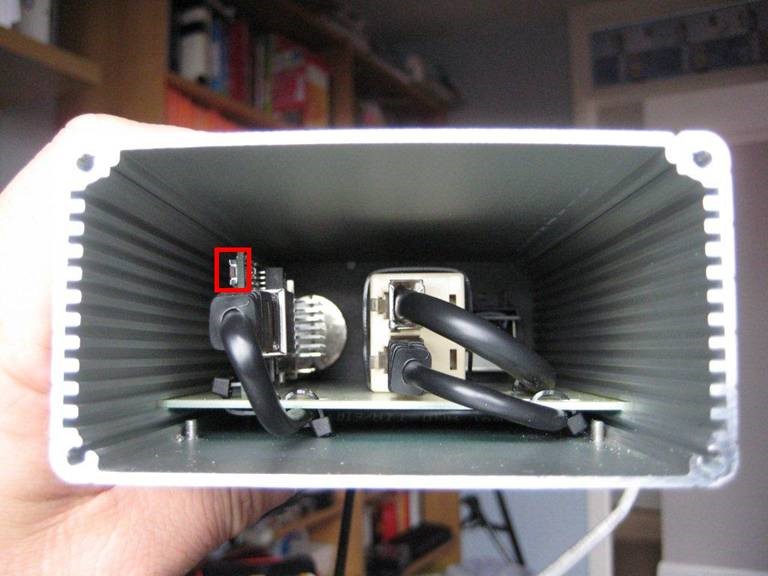
In the fast moving world of wireless technology, our WL510 is quite old now and you might get the message: “err_ssl_version_or_cipher_mismatch” when trying to upload the configuration file. This is due to the age of the firmware as V5.5.8 used TLS V1.0 which is no longer supported in most modern browsers. The way to get round this, is to use an older computer with an older browser on it. Once you have an older computer connected and can bring up the WL510 web interface, update the firmware to the latest version and the “err_ssl_version_or_cipher_mismatch” issue will be gone. The latest version of the WL510 firmware can be found here: https://digitalyacht.net/wp-content/uploads/2023/08/XM_v6_3_6.zip The attached file is a compressed ZIP file containing the latest firmware. Please unzip the single BIN file that is inside as this is the file that you need to upload to the WL510 not the ZIP file. Login to the WL510 web interface and go to the SYSTEM page. Then browse for the extracted BIN file, select it and then upload it. After the update, you will need to apply the configuration file. If you have followed the procedure to reset the WL510 then you must follow the procedure below to reconfigure the WL510. You must download the product firmware by clicking here. Configuration Procedure – Wireless Method After a reset, the WL510 reverts to a factory defaults state and needs to have a WL510 Configuration file uploaded to it (link above). Your WL510 currently has a fixed IP address of 192.168.1.20 and is not providing Automatic DHCP IP address allocation to any devices that are connected to it. Your iNavConnect/iNavHub/iKConnect is trying to get an IP address for its WAN socket from the WL510 but is failing to do so. All of our wireless routers use the 192.168.1.xxx range of IP addresses on their LAN network, so the easiest way to talk to the WL510 in this state, is to temporarily unplug it from the WAN socket on the router and plug it in to the LAN socket. Now the WL510, the router and any devices connected to it are all on the same network IP address range (192.168.1.xxx). Make sure your computer is wirelessly connected to the iNavConnect/iNavHub/iKConnect and then type http://192.168.1.20 in to the address bar of your browser. You should bring up the WL510 login page (see below), but you may get a security warning saying that the security certificate is not valid, but this is because your browser cannot get online to check the WL510’s security certificate, so just proceed… The default Username and Password after a Reset are “ubnt” (without the quotes) and you will need to select your country and also tick the accept conditions box. Once logged in, dismiss any warning about default administrator password that might appear and go to the “SYSTEM” tab. In the bottom right corner is the Manage Configuration section and you need to click on the “Choose File” button and then select the attached config file, from where ever you saved it to. Once selected, click the “Upload” button, followed by the “Apply” button that will appear and the WL510 default configuration will be loaded. It takes about 30 seconds for the WL510 to apply the new configuration and reboot itself with the new settings. While this is happening, unplug the WL510 from the LAN socket of the router and plug it back in to the WAN socket. When the WL510 has finished rebooting, you should be able to type 192.168.10.20 in to your browser and see the WL510 login page as normal and login using “wl510” as the username and password as usual. If you have followed the procedure to reset the WL510 then you must follow the procedure below to reconfigure the WL510. You must download the product firmware by clicking here. Configuration Procedure – Direct Cable Method After a reset the WL510 has a fixed IP address of 192.168.1.20 and does not provide IP addresses to devices that connect to it automatically. Therefore you will need to connect a PC or Mac to the WL510 using a normal network Ethernet cable and set the computer you are using to temporarily use a fixed IP address of… Fixed IP address = 192.168.1.2 Subnet Mask = 255.255.255.0 Once you have your computer set to this fixed IP address, it should be on the same network as the WL510 and if you open a browser you should be able to bring up the WL510 login page at http://192.168.1.20 This should take you to the normal Log In screen of the WL510 (see below). The default Username and Password after a Reset are “ubnt” (without the quotes) and you will need to select your country and also tick the accept conditions box. Once logged in, go to the “SYSTEM” tab and in the bottom right corner is the Manage Configuration section and you need to click on the “Choose File” button and then select the firmware file above which needs to be downloaded, from where ever you save it to. Once selected, click the “Upload” button and the WL510 production default configuration will be loaded. It takes about 30 seconds for this to happen and for the WL510 to reboot itself with the new settings. Whilst you are waiting for the WL510 to reboot, put the PC or Mac back to getting the IP address automatically. Once the WL510 has finished rebooting, your PC/Mac should get an IP address automatically in the 192.168.10.xxx range and you should be able to type http://192.168.10.20 in to your browser and see the login page as normal. At this point the Username and Password will be back to “wl510” as normal. The above screen shots are from a Mac but a PC should be identical. First you need to unscrew the four black screws that hold the end cap of the WL510 in – the end cap with no connectors… Once the end cap is removed look down in to the unit and you will see the Reset switch which I have highlighted in the red box…. Here is another picture showing the PCB with the six LEDs in the red box and my finger pressing the reset switch…. With the WL510 powered up and the end cap removed, press and hold the reset switch for at least 15 seconds. You should see the reflection of the LEDs on the left hand wall of the aluminium enclosure and normally there are a couple of green LEDs lit and during the 15 seconds you should see all six LEDs flash on, keep holding the reset button in for another few seconds and then release. You should now wait for about 20-30 seconds for the WL510 to reboot and proceed to the Configuration Procedure below. After you have reset the WL510, then we need to re-configure it before it will work properly. To decide whether to use the Mobile 4G connection or the WL510 long range wireless connection, you will need to go in to the 4GXtream web interface and click on the Network>WAN menu option….which will display the page below. You can use the switches at the end of each line to select whether you want to connect to the internet via Mobile 4G or via the WL510 Wi-Fi on the wired WAN interface. In the screen shot above, taken from my boat’s 4GXtream, I do not have an WL510 wireless booster connected to the Wired WAN interface, so it does not show any information about it but on your unit, with the WL510 connected, there should always be an 192.168.10.xxx IP address and uptime values. Just click Save and Apply after making your selection.WL510 Configuration File Update
Changing the default SSID and Password on our iNavConnect/iNavHub/iKConnect routers
Connecting our WL510 to a Password Protected type Restaurant/Bar hotspot
Connecting our WL510 to a Captive Portal type Marina hotspot
Configuring a WL510 after a reset (WiFi Procedure)
Configuring a WL510 after a reset (Wired Procedure)
WL510 Hardware Reset

Using WL510 with 4GXtream