Description
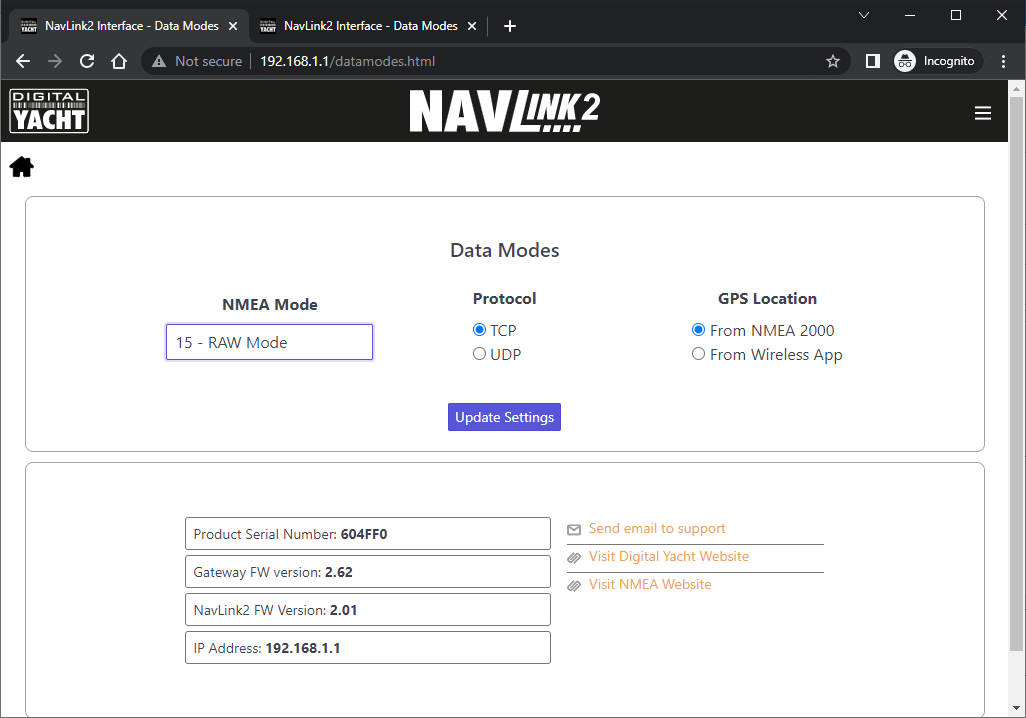
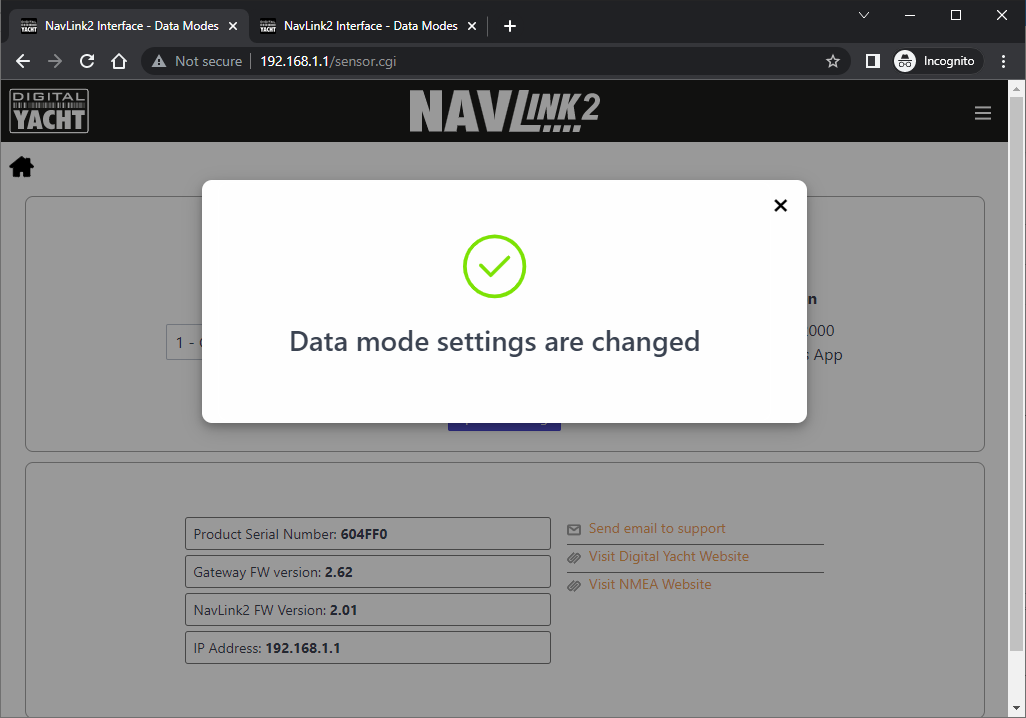
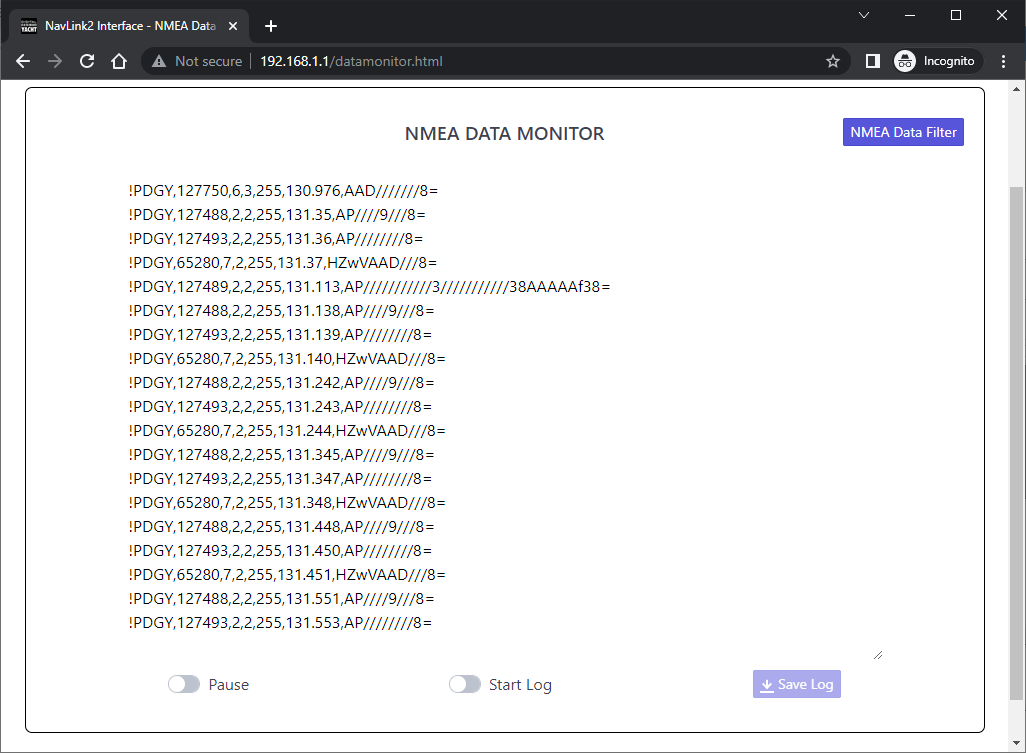
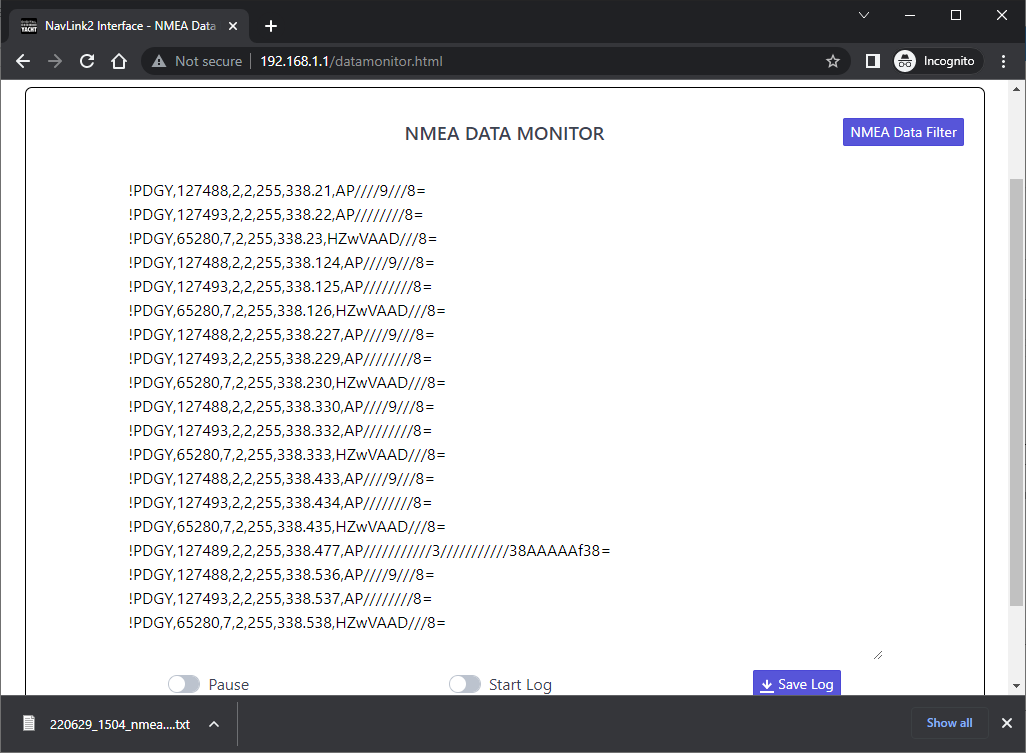
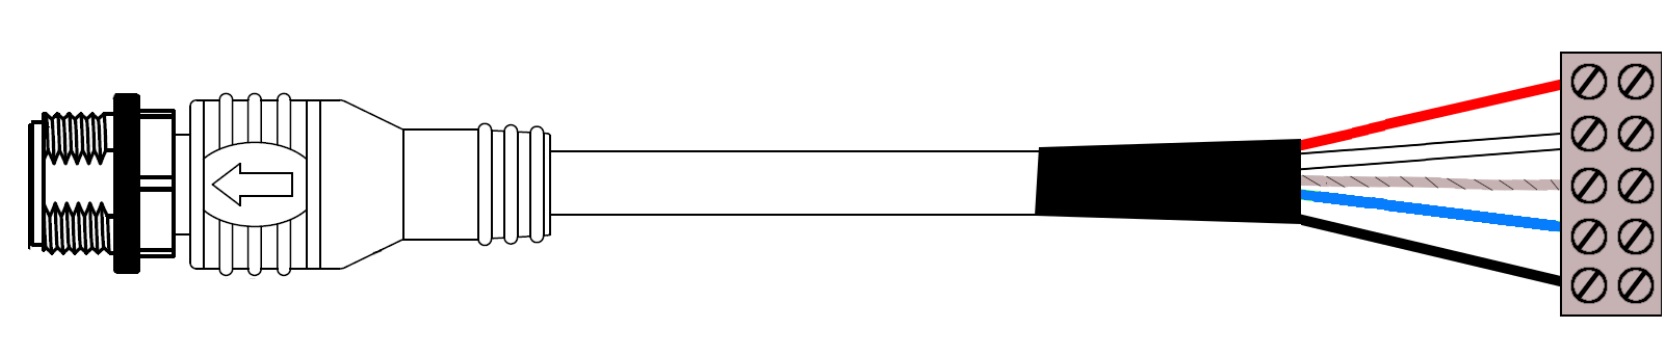
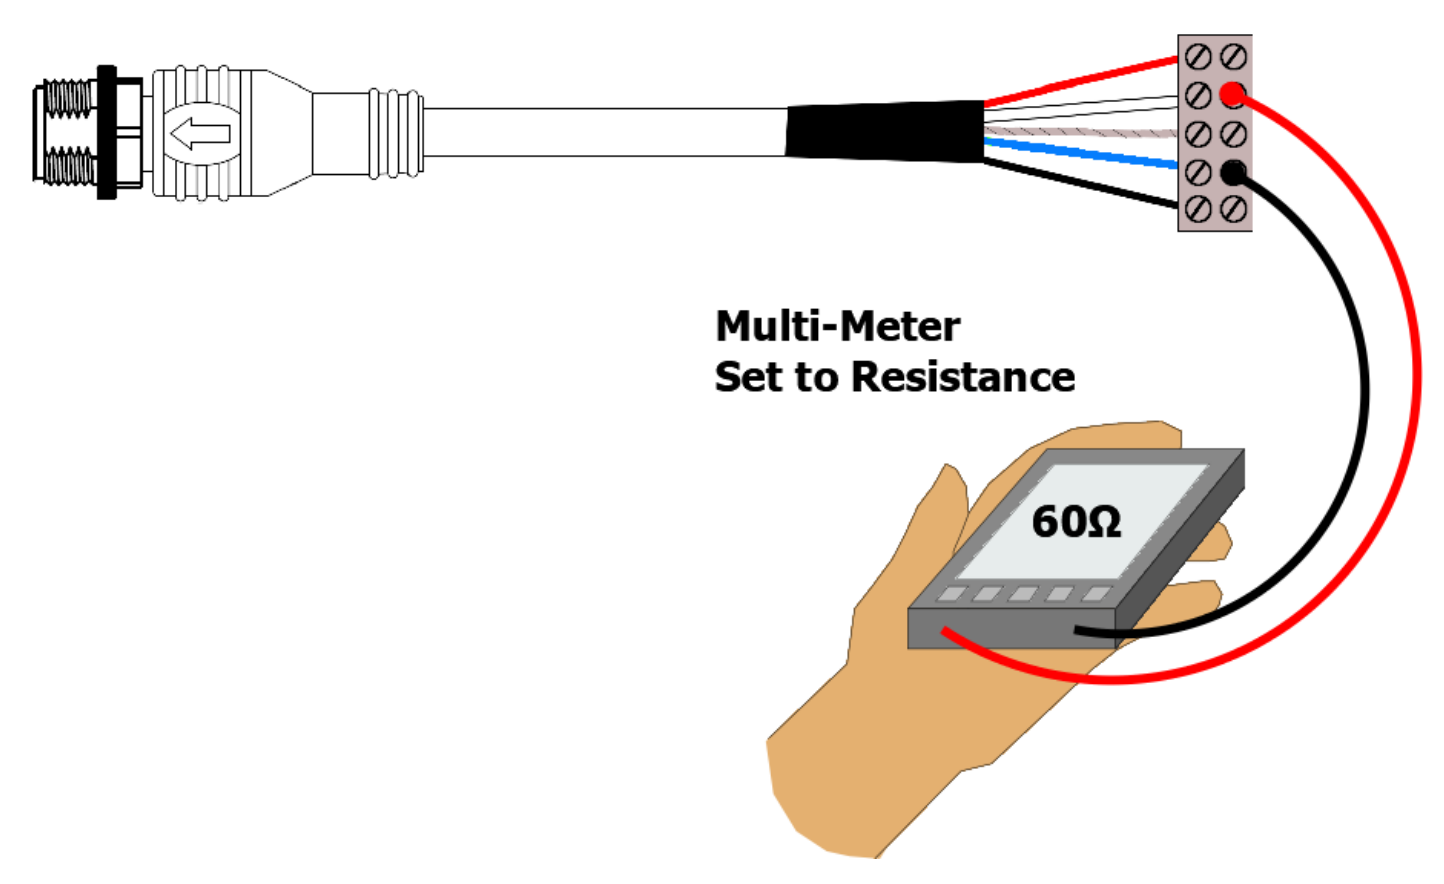
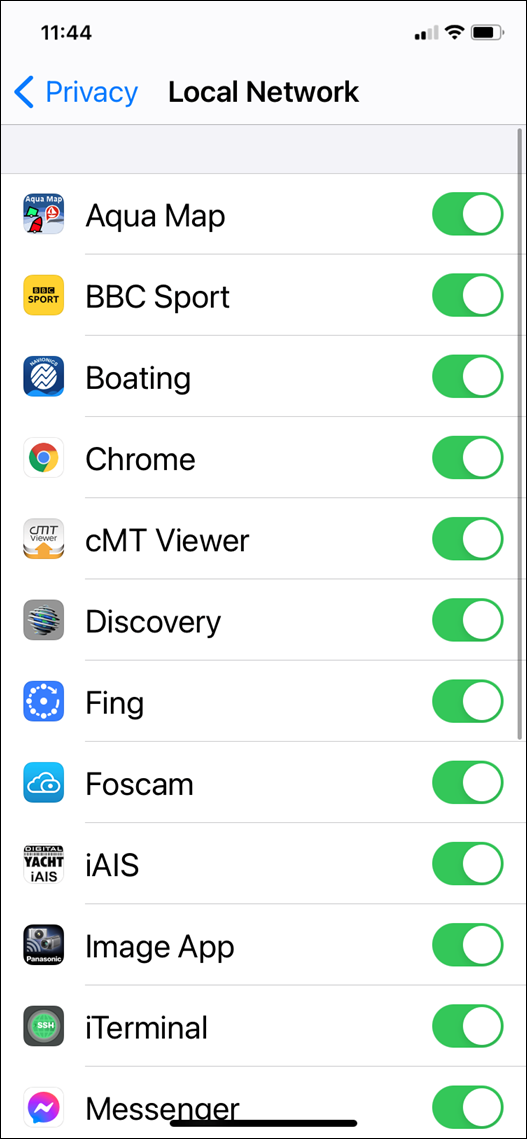
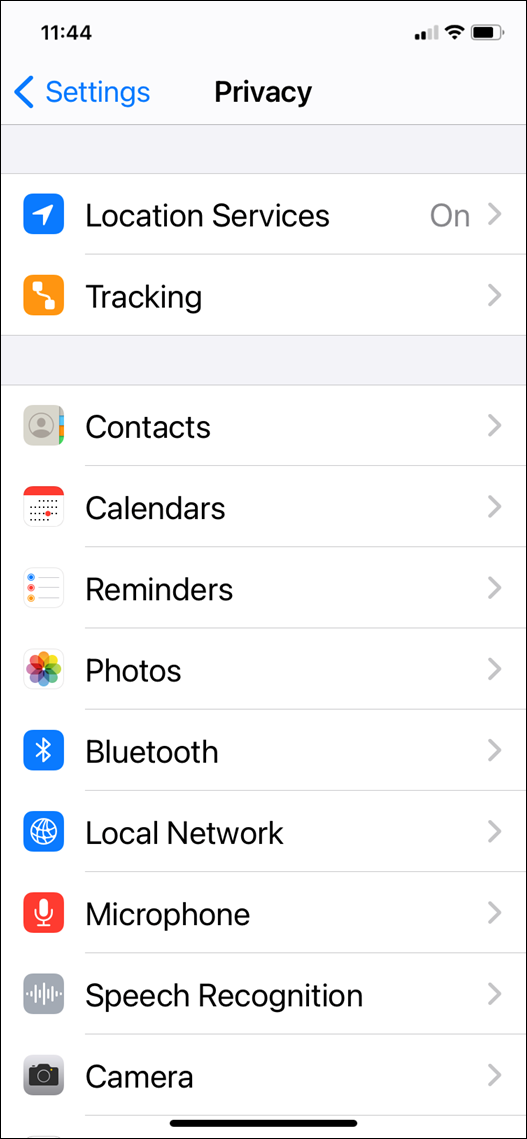
To check the TCP and UDP connections with another App to rule out that there may be an issue with the Navionics Boating App, use this – TCP UDP Server & Client on the Play Store which is a really good test tool for Android…. I setup a TCP Client and a UDP Server for NAVLink2/WLN10SM etc. and started them running (one at a time) and just watched the raw NMEA 0183 data coming in. There should be no crashes or stoppages of data. If this is all working fine but you’re still having connection issues, then please contact our support team. The Starlink router does use the same IP address range as our NAVLink2, BUT by default NAVLink2 creates its own wireless network “NAVLink-xxxx” which is the network you need to connect to, in order to configure it. The ‘xxxx’, is a four digit code, unique to your unit, and the wireless password is “PASS-xxxx”. So if your unit is “NAVLink-A12B” then your wireless password will be “PASS-A12B” without the exclamation marks. Once connected to NAVLink2, you can access its web interface at http://192.168.1.1 and go to the SETTINGS page. In the wireless network section, select STATION (STA) mode and tell NAVLink2 to access your Starlink network, rather than create its own. You can either look in the Starlink’s router web interface for what IP address it has given to NAVLink2 or you can use http://navlink2.local or http://navlink2.lan to bring up the NAVLink2 web interface and you can see what IP address it got in the SETTINGS page. However, if you use UDP protocol, instead of TCP, on whatever Apps you want to use with NAVLink2, then you do not need to know the NAVLink2’s IP address just enter 0.0.0.0 and Port 2000, in the App. We don’t have a manual TCP/UDP selector switch as the latest firmware supports concurrent UDP and TCP connections (1x UDP and 3x TCP). Just set the Navionics App to UDP, Hostname = 0.0.0.0 and Port = 2000 and it should work. Make sure you have the Navionics App enabled for LOCAL NETWORK service in the SETTINGS>PRIVACY & SECURITY menu on the iPhone. We have had a few of our dealers and customers successfully connect the Furuno DRS4W and our NAVLink2 together, so that you have one wireless network. The Furuno DRS4W must be the wireless Access Point and you have to tell our NAVLink2 to connect to the Furuno wireless network in Station mode – this is configurable in the NAVLink2 web interface SETTINGS page. When the NAVLink2 connects to the Furuno network, you will not know what IP address it has received, so it is important that you use UDP mode for receiving the NAVLink2 data, as this works without knowing the IP address – you just enter 0.0.0.0 and Port 2000 in Navionics. You should still be able to access the NAVLink2 web interface at http://navlink2.local If you get in to any trouble and lose access to the NAVLink2, you can always factory reset the unit by pressing and holding its RESET push button for >10 seconds. This will put it back to its default Access Point mode and you can try again. All NMEA 0183 sentences start with $XX which is called the “Talker ID” and identifies what type of product the data is coming from such as WI = Wind Instrument, II = Integrated Instruments, SD = Depth Sounder, EC = Electronic Charting system, etc. The following table explains the meaning of the WLN10/WLN30/Navlink2 LEDs: Unfortunately it isn’t as simple as just downloading the app on the new Mac and transferring the data over. If you backup/transfer your old mac to a new one, sometimes the problem is that the charts are still locked to the old computer. To transfer the data across, you will need to use the Mac OSX Terminal window. You need to use a ‘command line’ command to clear out the corrupted charts directory on your new Mac. 1) Exit NavLink Uk on your Mac 2) Open Terminal on your Mac and enter: rm -rf /Users/yourusername/Library/Containers/com.pocketmariner.seanav.gb.mac.dy/Data/Library/Application Support/NavLink UK/chartSets/gb/* Replacing yourusername with the user name you use on your Mac Or:- rm -rf ~/Library/Containers/com.pocketmariner.seanav.gb.mac.dy/Data/Library/Application Support/NavLink UK/chartSets/gb/* 3) Then reopen NavLink UK If you need any further support, please create a Support Ticket through this site. If you have an old or spare NMEA 2000 cable kicking around in your “come in handy” box, then put it to good use and create your own NMEA 2000 Test Lead. Assuming your cable is a Male to Female cable, you can actually create two test leads from the same cable, by simply cutting it in half, stripping back the outer insulation and fitting the five wires inside (Red/White/Blue/Black/Shield) to a piece of terminal “chocolate” block – as shown below. The Male Test Lead will actually be the most useful, as the majority of “back bone” connections are female, so you will be able to plug the Male Test lead in to any of these connections. The Female Test lead will be useful for connecting power to a “bus powered” NMEA 2000 device for firmware updating or configuration. For the following tests we will be using the Male Test lead and a multi-meter to measure the NMEA 2000 Supply Voltage across the Red and Black power wires and to make sure the network is properly terminated by measuring the resistance between the Blue and White Data wires. The NMEA 2000 network should be powered from a 12v supply and depending upon the number of devices on the network and the amount of power they take from the network, you may find voltage drops along the network. In extreme cases this can result in some devices not getting the proper 9.0v to 16.0v DC Supply voltage as specified in the NMEA 2000 specification. You can use the NMEA 2000 Test lead to plug in to the network at various locations and test the supply voltage. In a well designed NMEA 2000 network the voltage drop should never be more than 1.5v. So if the supply voltage is 12.5v then you should never measure less than 11v at any point in the network. The NMEA 2000 network should be properly terminated with a 120 Ohm resistor at each end of the backbone. No terminators, 1 terminator or more than two terminators can adversely affect the data signals and so it is important to test that your NMEA 2000 network is terminated correctly. Two terminators, give a parallel resistance reading of 60 Ohms and this is what you should read. Plug the test lead in to any spare socket on the NMEA 2000 network and with the NMEA 2000 Network’s power removed, do a resistance test between the Blue and White Data wires of the NMEA 2000 test lead. You should measure 60 Ohms +/- 5%. The two tests above are important basic tests to check the electrical integrity of your NMEA 2000 network, however with so many NMEA 2000 devices now being installed on boats, data and interoperability issues can also arise and if you wish to be able to more fully test and diagnose NMEA 2000 networks, our NAVDoctor NMEA 2000 Diagnostic tool is a good investment as this video will illustrate… The flashing Red Error LED indicates that your NAVLink2 has quite an early version of firmware. As you can imagine, there are loads of different NMEA 2000 devices installed on boats, of varying age and firmware versions and since we released NAVLink2, we have come across quite a few “odd situations” where unexpected combinations of data have caused our “software watchdog” to detect an issue and restart the NAVLink2. In each of these cases, we have had to release a firmware update for the NAVLink2, to fix the issue. We can update your unit to the very latest version (V2.70) for you free of charge, but you will need to post it back to our UK office following the procedure detailed in this FAQ: https://support.digitalyacht.co.uk/question/returning-a-product-to-our-uk-office-for-service/ Our iKonvert/NAVLink2 gateways make implementing NMEA 2000 much easier, with no old, proprietary libraries, just a simple serial protocol that is published online at… https://github.com/digitalyacht/iKonvert/wiki/4.-Serial-Protocol The gateways take care of all of the complicated address claiming, network discovery and NMEA 2000 network management, simplifying and speeding up your software implementation. Here is a link to our iKonvert Developers Guide on GitHub… https://github.com/digitalyacht/iKonvert You will need a copy of the NMEA 2000 Appendix B in order to decode the NMEA 2000 PGN data, which is available from the NMEA organization. If you have not already developed software to read and write NMEA 2000 data, then you might want to look at the open source CANBoat software, which supports our iKonvert as detailed in the CANBoat Wiki, see link below. The developer Kees, has over a number of years, reverse engineered the NMEA PGNs and the data is translated in to a more simple and open JSON format. The WLN10, WLN30 & NavLink2 have a built-in web interface. We have released a new web interface as well as some new functionalities. You can now filter the NMEA data and untick specific NMEA sentences which may create conflicts with some apps or software. You can also choose a specific mode for the product, for instance, you can choose the AIS mode to only send AIS and GPS data to get a better result with an app that can only accept AIS & GPS data, such as Navionics. The data monitor has also been improved and it is now easier to save the data. You can also choose to merge the product to an existing WiFi network and this functionality has also been enhanced to make it easier. This video explains how to update the built-in web interface. Since the NavLink2 unit was originally released we have released a few firmware updates to improve performance and add features. The latest version is V2.00 and we would recommend this update to anyone who has an earlier version of firmware on their unit – you can see the version number in the footer of the NavLink2’s main web page. The firmware update file (NavLink2_V2-00_OTA.zip) can be downloaded from our GitHub repository by clicking here. IMPORTANT NOTE – the file you download is a compressed ZIP file, make sure you extract the binary (.bin) file inside and upload this file, not the ZIP file, otherwise you could “brick” your NavLink2 and it will need to come back to Digital Yacht for repair (not under warranty). We have tried to make the firmware update process as easy as possible on this new NavLink2 model and everything is done through the unit’s built-in web interface. To make things even easier, we have produced a short video of the process. This video explains how to update the WLN10’s web interface but it is the same process for the NavLink2: By default, NMEA to WiFi server’ creates a wireless Access Point (hotspot) on-board your boat. The Name (SSID) of the Access Point will be “NavLink2-xxxx” or “DY-WiFi-xxxx‘, etc, depending on the product you’ve purchased, where xxxx is the unique four digit code of your device. To connect to the NMEA to WiFi server, you will need to scan for wireless networks, find and select it in the network list and then when prompted, enter the default WPA2 password, which is “PASS-xxxx”, where xxxx is the same, unique four digit code that is in the hotspot name. For instance, if you have a WLN30 and the WiFi network name created is DY-WiFI-D4B7 then the WiFi network password is: PASS-D4B7 If you don’t receive the NMEA data on your iPad or iPhone, then you must follow this procedure: 1- Close all apps in the background or restart your device. Always a good idea to shut down your iPad/iPhone device and then power it back up again, as this will close all background apps and ensure all of the right services are running. For more information: https://digitalyacht.net/2018/07/27/background-apps-stopping-wireless-nmea-transmission/ 2- Local Network Settings If you are using iOS 14 or higher, make sure the “Local Network” privacy settings are enabled for the app they want to use…. Go to Settings>Privacy>Local Network and make sure that the App is in the list and enabled…. 3 – UDP or TCP? Check what mode/protocol our product is set to, TCP or UDP (check product manual) and ensure that you set the same type of connection in the App. If the device is set to UDP and you try to use TCP in the App it will not work, both the device and app must be set to the same mode/protocol TCP or UDP. For TCP connections you need to enter an IP address of 192.168.1.1 and Port 2000, while for UDP you need to enter 0.0.0.0 and Port 2000, or if this fails try 192.168.1.1 4- App configured? You must make sure that your app is configured. You should look at our section How to Configure Apps & Software to find out how to configure your navigation app. 5- GPS Settings If you want the app to use the GPS data from the wireless connection, then go to Settings>Privacy>Location Services, on your iOS device and set the App to “Never” which will force the App to use the GPS position from the wireless connection, rather than try and use its internal GPS or even worse “Assisted GPS” if it is a Wi-Fi Only iPad. The Wi-Fi will typically footprint a boat up to 25m LOA. Contact us if you need a bigger footprint or have a steel or carbon vessel. Yes! You can program this through the web interface so you just have one Wi-Fi network on board with our product linked directly to your other Wi-Fi network as a client. This is explained in your product manual. This works well as well with Furuno WiFi radar installations. We keep on our blog a list which explains how to configure all the popular navigation apps & software. This list explains how to configure a NMEA connection (UDP/TCP) on the app/software but also how to configure the AIS settings. To see the list, please click here. Access the NAVLink 2 web interface and confirm it is the latest version as per the screen shot below…. Select the “Data Modes” page, set the NMEA Mode to “15 – RAW Mode” and click the “Update Settings” button… Ensure you get the Data Mode changed successfully message…. Now go to the “View Data” page and you will see data, similar to that shown below, scrolling down the screen… Now switch the “Start Log” button to ON and leave this page running for at least 15-20 minutes, so that we get a good selection of data. If there is a particular situation that causes a problem, please recreate this situation while the log is running. Once you have collected enough data, switch the “Start Log” button to OFF and click the “Save Log” button which will now be active. Your browser will now download the log file in to your “Downloads” folder… Please ZIP the text file and email to us for analysis.Testing UDP and TCP connections with a Testing App
Setting up NavLink2 with Starlink – same IP address issue.
Select the Starlink network in the Station SSID drop down box and enter whatever your Starlink’s wireless password is. Once you are happy, click the UPDATE SETTINGS button and the NAVLink2 will reboot and connect to Starlink rather than create its own network. Starlink will give NAVLink2 an IP Address in the 192.168.1.x range, but not 192.168.1.1
NavLink and Furuno DRS4W Radar
WIMWV instead of MWV from wind sensor
What do the LED indicators mean on WLN10/30/NavLink2?
Condition
Red LED
Yellow LED
Green LED
ON (Solid)
Failed to Connect in STA Mode
HTTP or TCP Connection
Blink
AP Mode
Data
Wireless Connection
OFF
Connected in STA Mode
No Data
No Connection
How can I transfer my NavLink UK Software over from an old computer to my new Mac?
Testing NMEA 2000 Network
NMEA 2000 Supply Voltage Test

NMEA 2000 Correct Termination Test
Using NAVDoctor to fully test an NMEA 2000 network
Navlink2 LED Flashing red
I am a software developer, how can I learn more about implementing NMEA 2000 data in my software by using iKonvert/NAVLink2?
How to update the built-in web interface?
How to update the NavLink2 firmware?
What’s the WiFi network password?
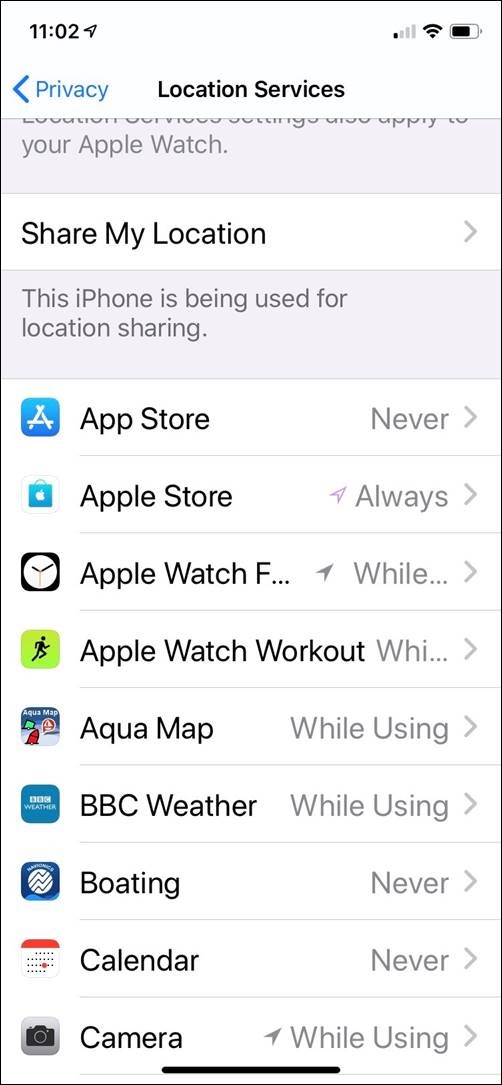
I don’t receive NMEA data on an iPad/iPhone app
What is the WiFi range/coverage of my product?
I have already a Wi-Fi router on board – can I join the product Wi-Fi to an existing network?
How to configure a navigation app or software?
How to Log “RAW” NMEA 2000 Data on Latest NAVLInk2